
I see a lot of people investing in fancy equipment to process their concentrates. Some folks just like having & using cool tools, I get it. Still, please don’t feel obliged to do the same. Getting to clean gold doesn’t have to mean spending big money on fancy gear, especially if you are just panning, sluicing or high banking.
Here’s my method:
1. Classify 30/50/100 (100 is optional depending on your cons). Here are the classifiers I use:
Mini Stackable Classifiers
As you will see on the Amazon page you can get a variety of sizes. I always use the 30 mesh and the 50 mesh. Sometimes I add in the 40 mesh if the amount of 30-50 mesh cons is high. Sometimes I also include a 60 for the same reason…the more cons you have, the more sensible to classify into smaller piles to pan separately. True Confessions: I now own the 30, 40, 45, 50, 60, 70, 100 and 125 sizes! Note: Be sure to clean the classifiers occasionally by rubbing the backside of the mesh with a spoon to press out particles that get caught in the mesh. And remember, some of those particles will be gold!
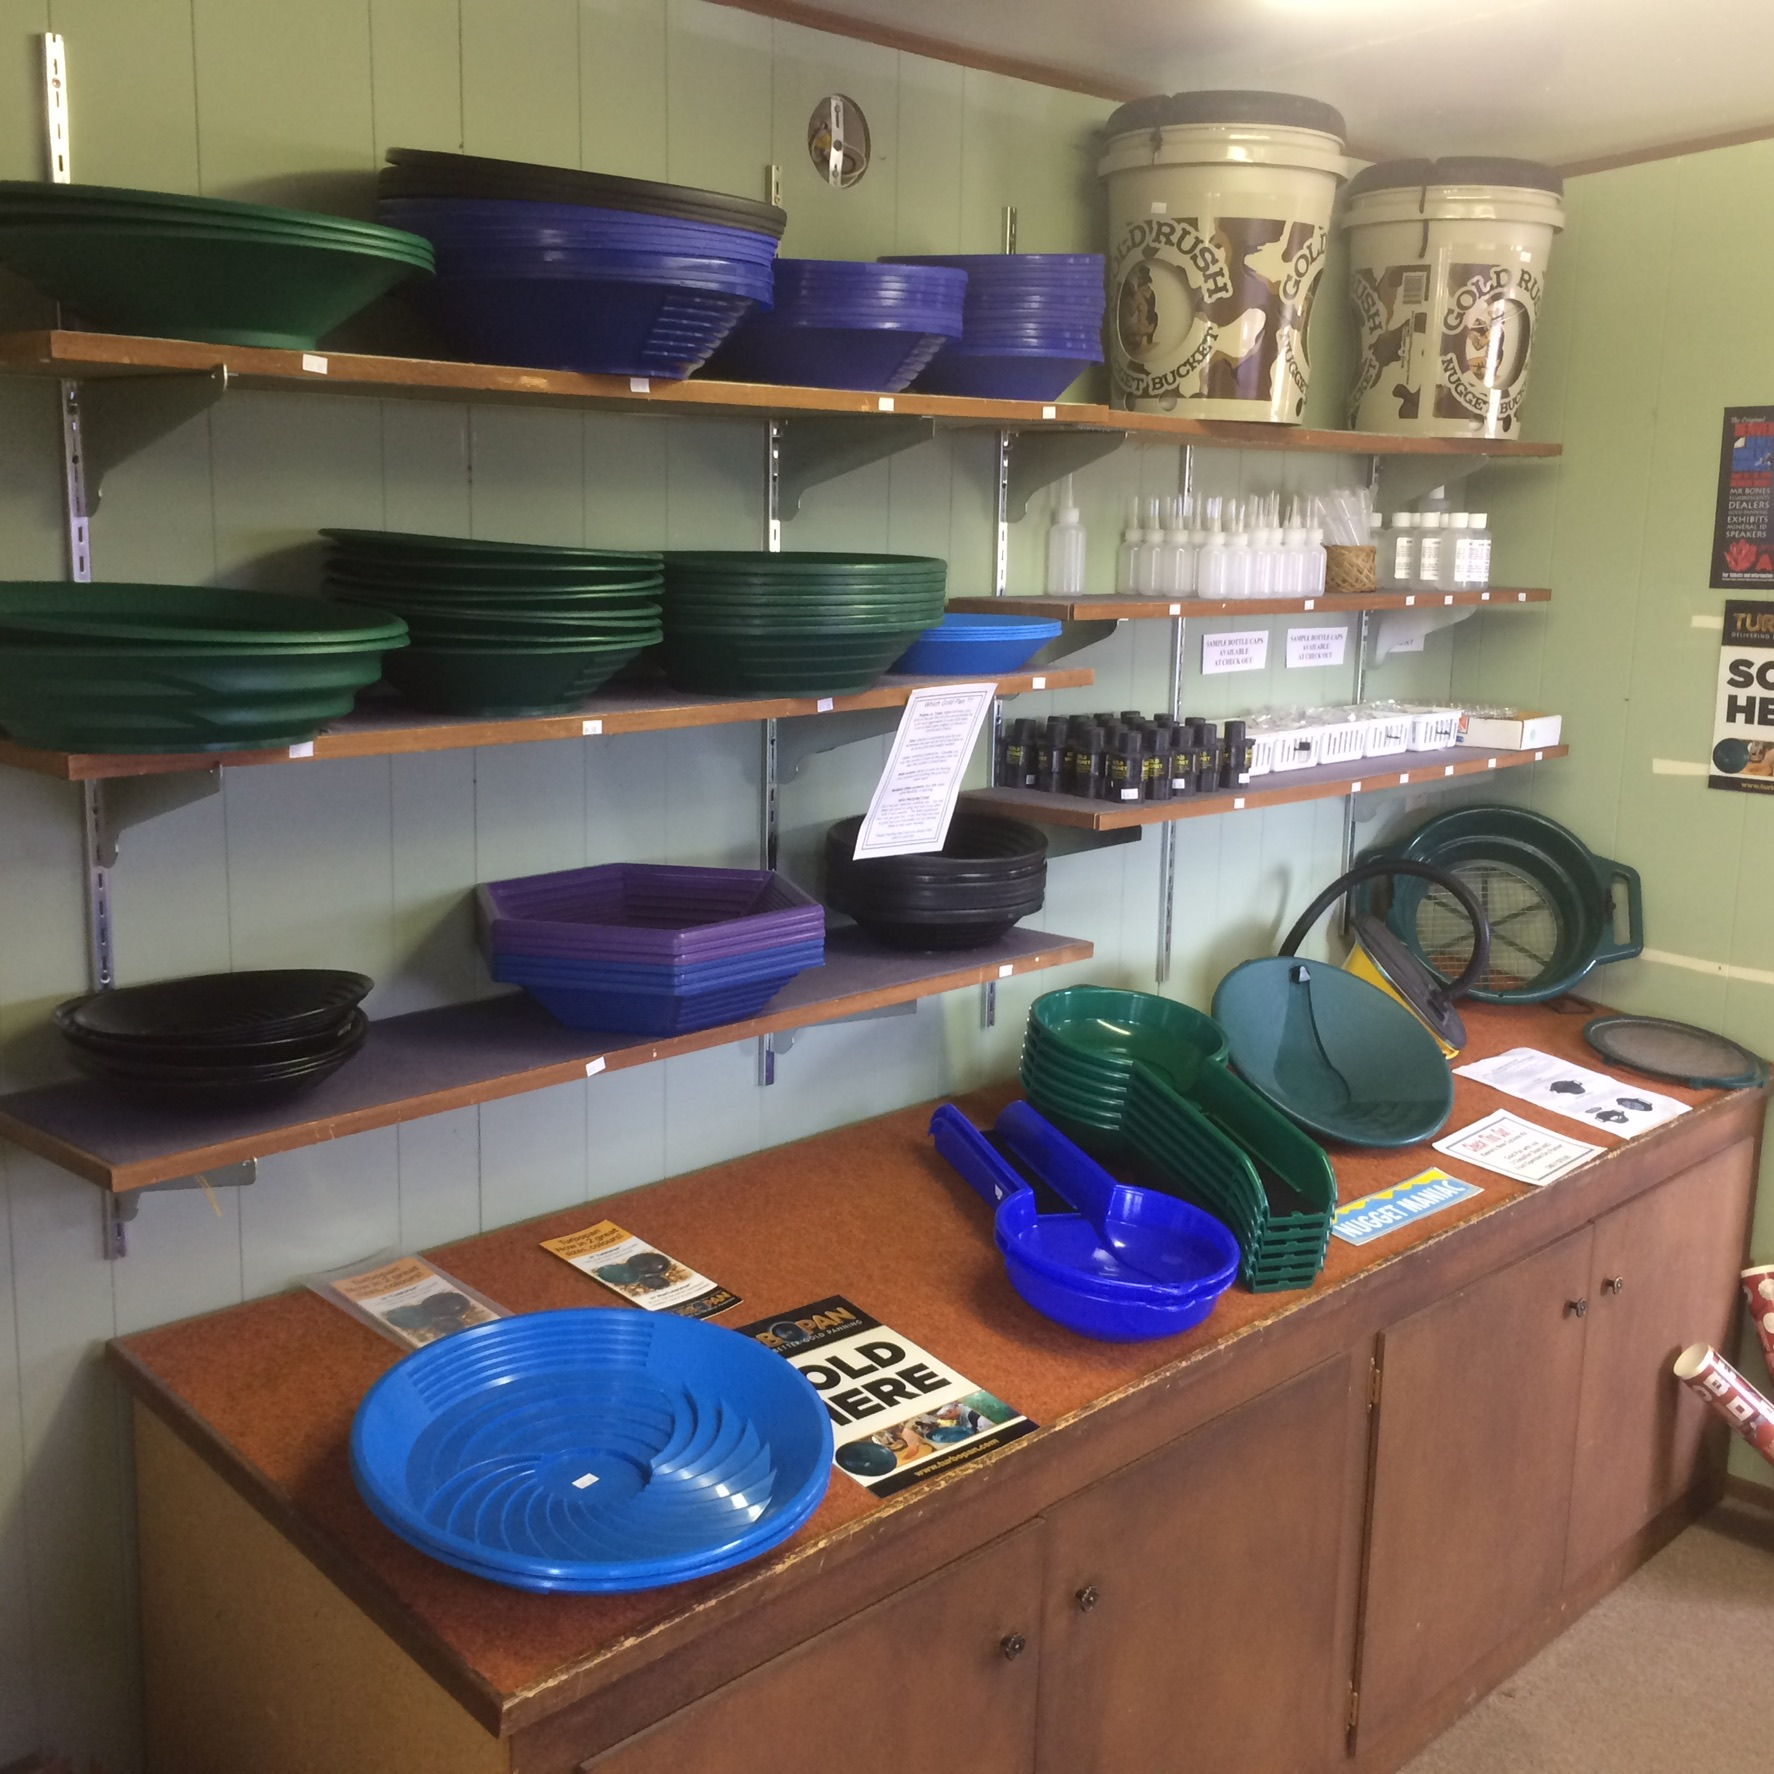
2. Put each classified portion in a separate pan covered in an inch or so of water. Here’s the pan I like:
SE GP1001BL 10-Inch Plastic Gold Mining Pan Black (4-pack) but if those aren’t available, these are good too Stansport Professional gold pan – they just cost a little more.
3. Pull magnetic sands up thru water using a rare earth magnet (waving it back and forth in the water so any non-magnetics are washed out). I use a magnet like this: 2Pc Neodymium Magnet 1.5″ Countersunk
I put a long bolt thru it and put the whole thing in a yogurt cup…then just lift up the magnet by the bolt to drop the iron sands. See additional details on my magnet-use techniques down in the comments.
4. Pan each material down to just the heavies (jet dry in the water). Jet-Dry Rinse Aid…as if you needed a link to that!
5. Next use swirl/shimmy/shake&tap methods to separate gold (adding more jet dry to the -50 pan(s)) You may have to separate the finer material into multiple pans so the amount in each is manageable. See videos below on how to do this method.
6. Suck up gold as you go, putting it in a smooth bottom ceramic soap dish. I got mine for two bucks at Walmart but anything smooth bottomed will work. walmart.com Soap-Dish The truth is I bought several of these in medium blue, black, light blue and dark green to experiment with which colors worked best for me. The gold looks great in the black dish but removing the last grains of black sand is easier in one of the other color options. Here’s how I do that.https://fb.watch/G-3-aoqxXo/?
7. Swirl the gold in your soap dish and use a suction pipette to remove last grains of sand. (See soap dish use details below) If you can’t find suction pipettes locally, here’s a cheap source for a lifetime supply (LOL): 3ml Plastic Liquid Transfer Pipettes, Pack of 100…sell the extras to friends maybe? I give them away for free when I teach newbies to gold pan.
8. Post pic on your favorite online forum (or even here!) so your fellow prospectors can see how you did.
9. Let gold dry, weigh and add to vial 😀 Here’s the scale I use to weigh my gold:
20 Gram Scale, 20 by 0.001 G A lot of weighing containers have problems with static electricity which will hold onto the gold. After talking with a friend that reloads brass shells, I tried this little brass pan set – it’s a game changer. So easy to use and zero static!
…all of this takes 30-45 min after a typical outing.
Key point here is the tools: classifiers (needed for every method), 10′-12″ smooth bottom black pans, magnet, Walmart soap dish, suction pipette. That’s all folks! No fancy, expensive equipment needed.
Here’s a similar process from my friends at Gold Cube: https://goldcube.net/gold-cube-university/ (scroll down to the Fine Gold Challenge) although they classify dry which I discourage strongly.
Here’s another good one on how to swing a pan from Doc at Gold Hog:
http://www.youtube.com/watch?v=8wwC4cb8qpo
And starting at the 12:30 mark, another good Doc video: http://www.youtube.com/watch?v=YyBLBaBuW6k
…and one more from Doc with gold cube and panning tips:
Note for those learning the technique Doc is demonstrating: You should classify further than he did for an easier time “tapping”. His material was all -30…by separating out the -50 or -60 material, you’ll have to do the process twice but it’s much easier and faster overall.
Also, did you notice how he uses his fingers and when done touching the material, he taps his fingers in the water? This keeps your gold in the pan instead of sticking to your finger 🙂
If you come home from dredging with 2+ GALLONS of material, that’s another story. In that case, I can see running a “poop tube” style recirculating sluice to further concentrate your material…or you could just do that via a sluice at the river.
If you have a link to a panning video you like, feel free to add it in the comments!
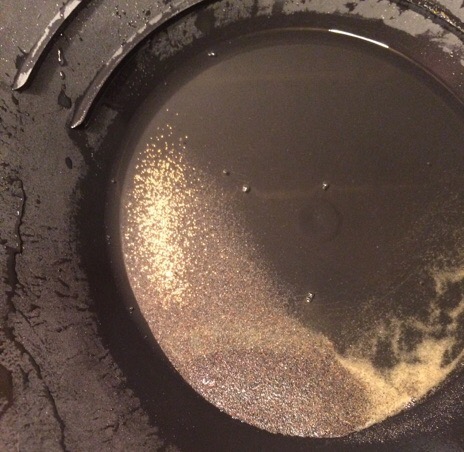
Oh, and here’s a soap dish of gold from one of my 1/2-day outings:

…I wish they were ALL this good!
Soap dish wrangling details:
Swirling Technique:
1. Set dish on a solid, smooth surface (tabletop – not work bench)
2. Put the -50 or -100 gold and not-gold in the soap dish
3. Include a very small amount of Jetdry and water (add a little more if needed along the way)
4. Grasp the dish by the outside edges and move it in a circular fashion while still flat on the table. Speed up as you get the feel for it, but high speed will not be needed.
5. When you stop the motion, you’ll see a tail of “not gold” to suck up at one end of your material!
Backwashing technique:
You can also use a backwashing technique with the soap dish. The super smooth surface means you can be both quick and gentle at the same time, important for -50 and -100 gold. You’ll be surprised at how little water is needed for backwashing…if it’s not working for you, take out some of the water! Watch a video of this trick on YouTube here.
Also, if you want to be compulsively thorough (like me!) whatever you suck out with these processes should go in a finish pan for re-inspection.
Want to classify even further to separate incredibly fine gold? For classifying extremely fine concentrates, these herbal pollen screens on Amazon work well (click here). For reference the sizes 120, 160 and 220 microns equate to about 125 mesh, 90 mesh and 70 mesh. If you want to go ultra-small, try this set (click here) which includes 75, 45 and 25 microns; those equate to 200, 325 and 500 mesh!! I bought the first of these sets and do sometimes use the 125 mesh, but I can’t personally see why I would go smaller.
This site costs money to keep up. The only way it pays for itself is shopping referrals. If you appreciate the info here, please click thru one of my Amazon ads the next time you want to shop online. It won’t cost you anything extra and it keeps the site going. Start here.
21 thoughts on “Finish processing your concentrates after a day of digging”
I also still only pan out my concentrates. Although i only screen it once. I screen to approximately 20mesh (kitchen strainer). I can then easily see and pick put any gold that is larger than that. Next i pan the black sands down, just a tea spoon at a time, with a 14″ pan into another 14″ pan. I then do the “blueberry bounce” tap and wash until only the gold is concentrated in the corner of the pan. As i am bringing home roughly 1lb of black sand on each trip lately i will go thru all of it twice this way to recover all visible gold. At this point in my snuffer bottle is 99% gold with a few pieces of black sand. I empty the bottle and do the tap and wash again this time completely removing anything but gold. I then dry and weigh it, making notation of how much and were from and then add it to the rest.
…and post it on treasure net of course 🙂
If you added a 50 mesh classifier to your routine, you’d be surprised how much faster and easier the panning was of both the +50 and -50 material!
Kevin,
Carl Adams from GP of the Rockies.
Watched the video from Gold Cube Univerity above and got a lot out of it. I always thought that classifying wasn’t needed but from what you said and the video I’m looking for 4 or 5 classifiers, saw some 5″ ones on line, not sure if shop in Golden has the small ones or not. Also need the Soap Dish and Pipette, should have every thing else.
Was down on Little Dry Creek last Saturday to try a spot there.
Thanks for stopping in and glad to help Carl!
On a regular basis, I only use 3 classifiers:
– 4 mesh in the field to take the bigger stones out of my concentrates
– 30 and 50 mesh in my workshop for finish panning
….and a couple times a year I pull out the 100 mesh to process my accumulated non-magnetics super-cons at I save up as the leftovers from finish panning. However at the rate I’m going, I’ll never pay off that 100 mesh screen so it’s hard to say that’s a smart purchase.
Gold-n-Detectors definitely has the classifiers in a size that fits a 5 gal bucket or a large gold pan. I use those and other times I use my 6″ sieves (which are much cheaper). The bigger ones are much faster!
By the way, a caution about our classifiers:
Gold is soft so it’s very easy for pieces of gold to get caught in the mesh of a classifier if they happen to be just the right size. This means:
– always treat your classifiers as if they have gold in them ( they most likely do!)
– clean them out occasionally by flipping them upside down over a large gold pan and
– rubbing the back side of the mesh with a smooth stone or the back of a large spoon to push material trapped in the mesh back thru the way it came and then
– banging the classifier and pan down hard on the counter a couple times
…and then panning out the resulting material.
When I do this with my 30 and smaller classifiers, I always find gold. You’ll also end up with a clean classifier that works better since you’ve unclogged a lot of holes in the mesh 🙂
PS looking forward to hearing how your outing went.
Very nice blog. It’s always nice to see people who share their passion with others. Good luck in your gold digging efforts!
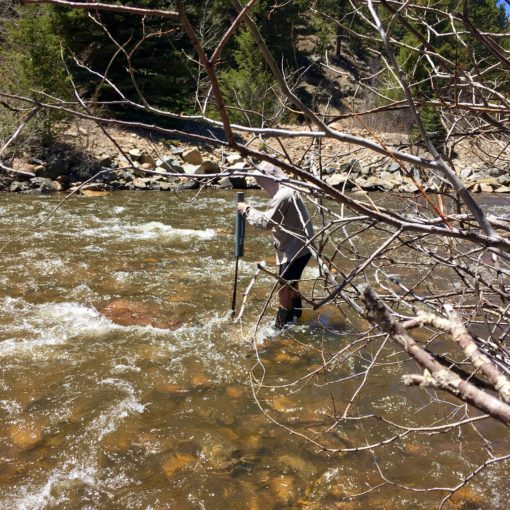
Here’s a great video on Creekside panning by fellow Coloradan Freddy Dodge:
https://m.youtube.com/watch?v=ZCL6FKQZyoM
Here’ more detail on step 3 of the process, especially helpful when your volume of concentrates is higher:
1. Classify first
2. Put cons in a large pan, in a thin layer, under an inch or so of water
3. Wave the magnet over the water drawing the material up thru the water. This will wash any non-mag material out as it comes up.
4. Dump magnetite and repeat.
5. Once no more is coming up, lower the magnet into the water somewhat using a back and forth or swirling motion to wash the material as it gathers on the magnet…don’t touch the material directly yet.
6. Dump and repeat.
7. Finally grind the magnet around in the material to get the last of the magnetite. Drop this material right back in the pan- it’ll land on top of the rest of the cons. Repeat step 5 once to grab this last material.
Good job, time to pan.
It took me longer to write this than it takes to do it!
I do still dry out the magnetic material after separation to re-separate it and see if it stole any gold…often the answer is “no”!
I also crush my +30 mags in a little rod mill to liberate any further gold and do find a few pieces that way 🙂
Great post! Will definitely be trying this the next time I get back from the creek. I recently made a video for seasoning your gold pan that I thought you might like.
http://goldpanningzone.com/gold-panning-videos/
Thanks for the informative article.
Terry
Thank you
A lot of great information in here, Kevin – thanks!
Very informative, have a lot to learn.
Thanks Kevin. Interesting info. Now more practice for me. Also the soap dish link failed, but I can figure that out.
Thanks. Good to know about the soap dish link. I’ll have to see if I can find a new one.
Thanks for all you knowledge and recommendation I’m sure I refer back as I try to learn
Kevin, you are the man! I’ve now officially gotten the bug again-in no small part thanks to this website and all that you do. I’m in South Denver/Englewood and have been getting after it in the places around me and now looking at the maps (thanks to your book) to keep hunting. Had a few folks actually come down and take selfies last week while I was panning. Thank you for keeping this alive and for all of the information you provide.
David, thanks, that’s great to hear. Sounds like, at least in your case, I’ve reached my goal!